Heatmaps that show where each person got stuck
Behavly paints clicks, rage clicks, movement and scroll over your real site, for everyone or for one signed-in person. The same activity is what your follow-up emails are built from.
· Updated
A heatmap of everyone shows you where a page works. A heatmap of one person shows you where it stopped working for them, and who they are. In Tracking → Heatmaps, every identified user has their own map, across every device they used.
And because the same snippet feeds your campaigns, what that person did can also shape the email they get next.
Four layers, painted on your real page
A heatmap is drawn over your own site. It opens your tracked domain in a new tab with an overlay painted on top of the real, live page, so you see your current design rather than a copy of it. The overlay has four layers:
- Clicks: where people clicked.
- Rage clicks: what people clicked at in frustration.
- Movement: where the pointer lingered.
- Scroll: how far down each page people got.
The Heatmap button at the top of the page opens one map for whoever Whose activity is set to: everyone, only identified users or only anonymous visitors. It opens on the Busiest page unless you pick another in Page. With several tracked sites, the map opens on the site that page belongs to.
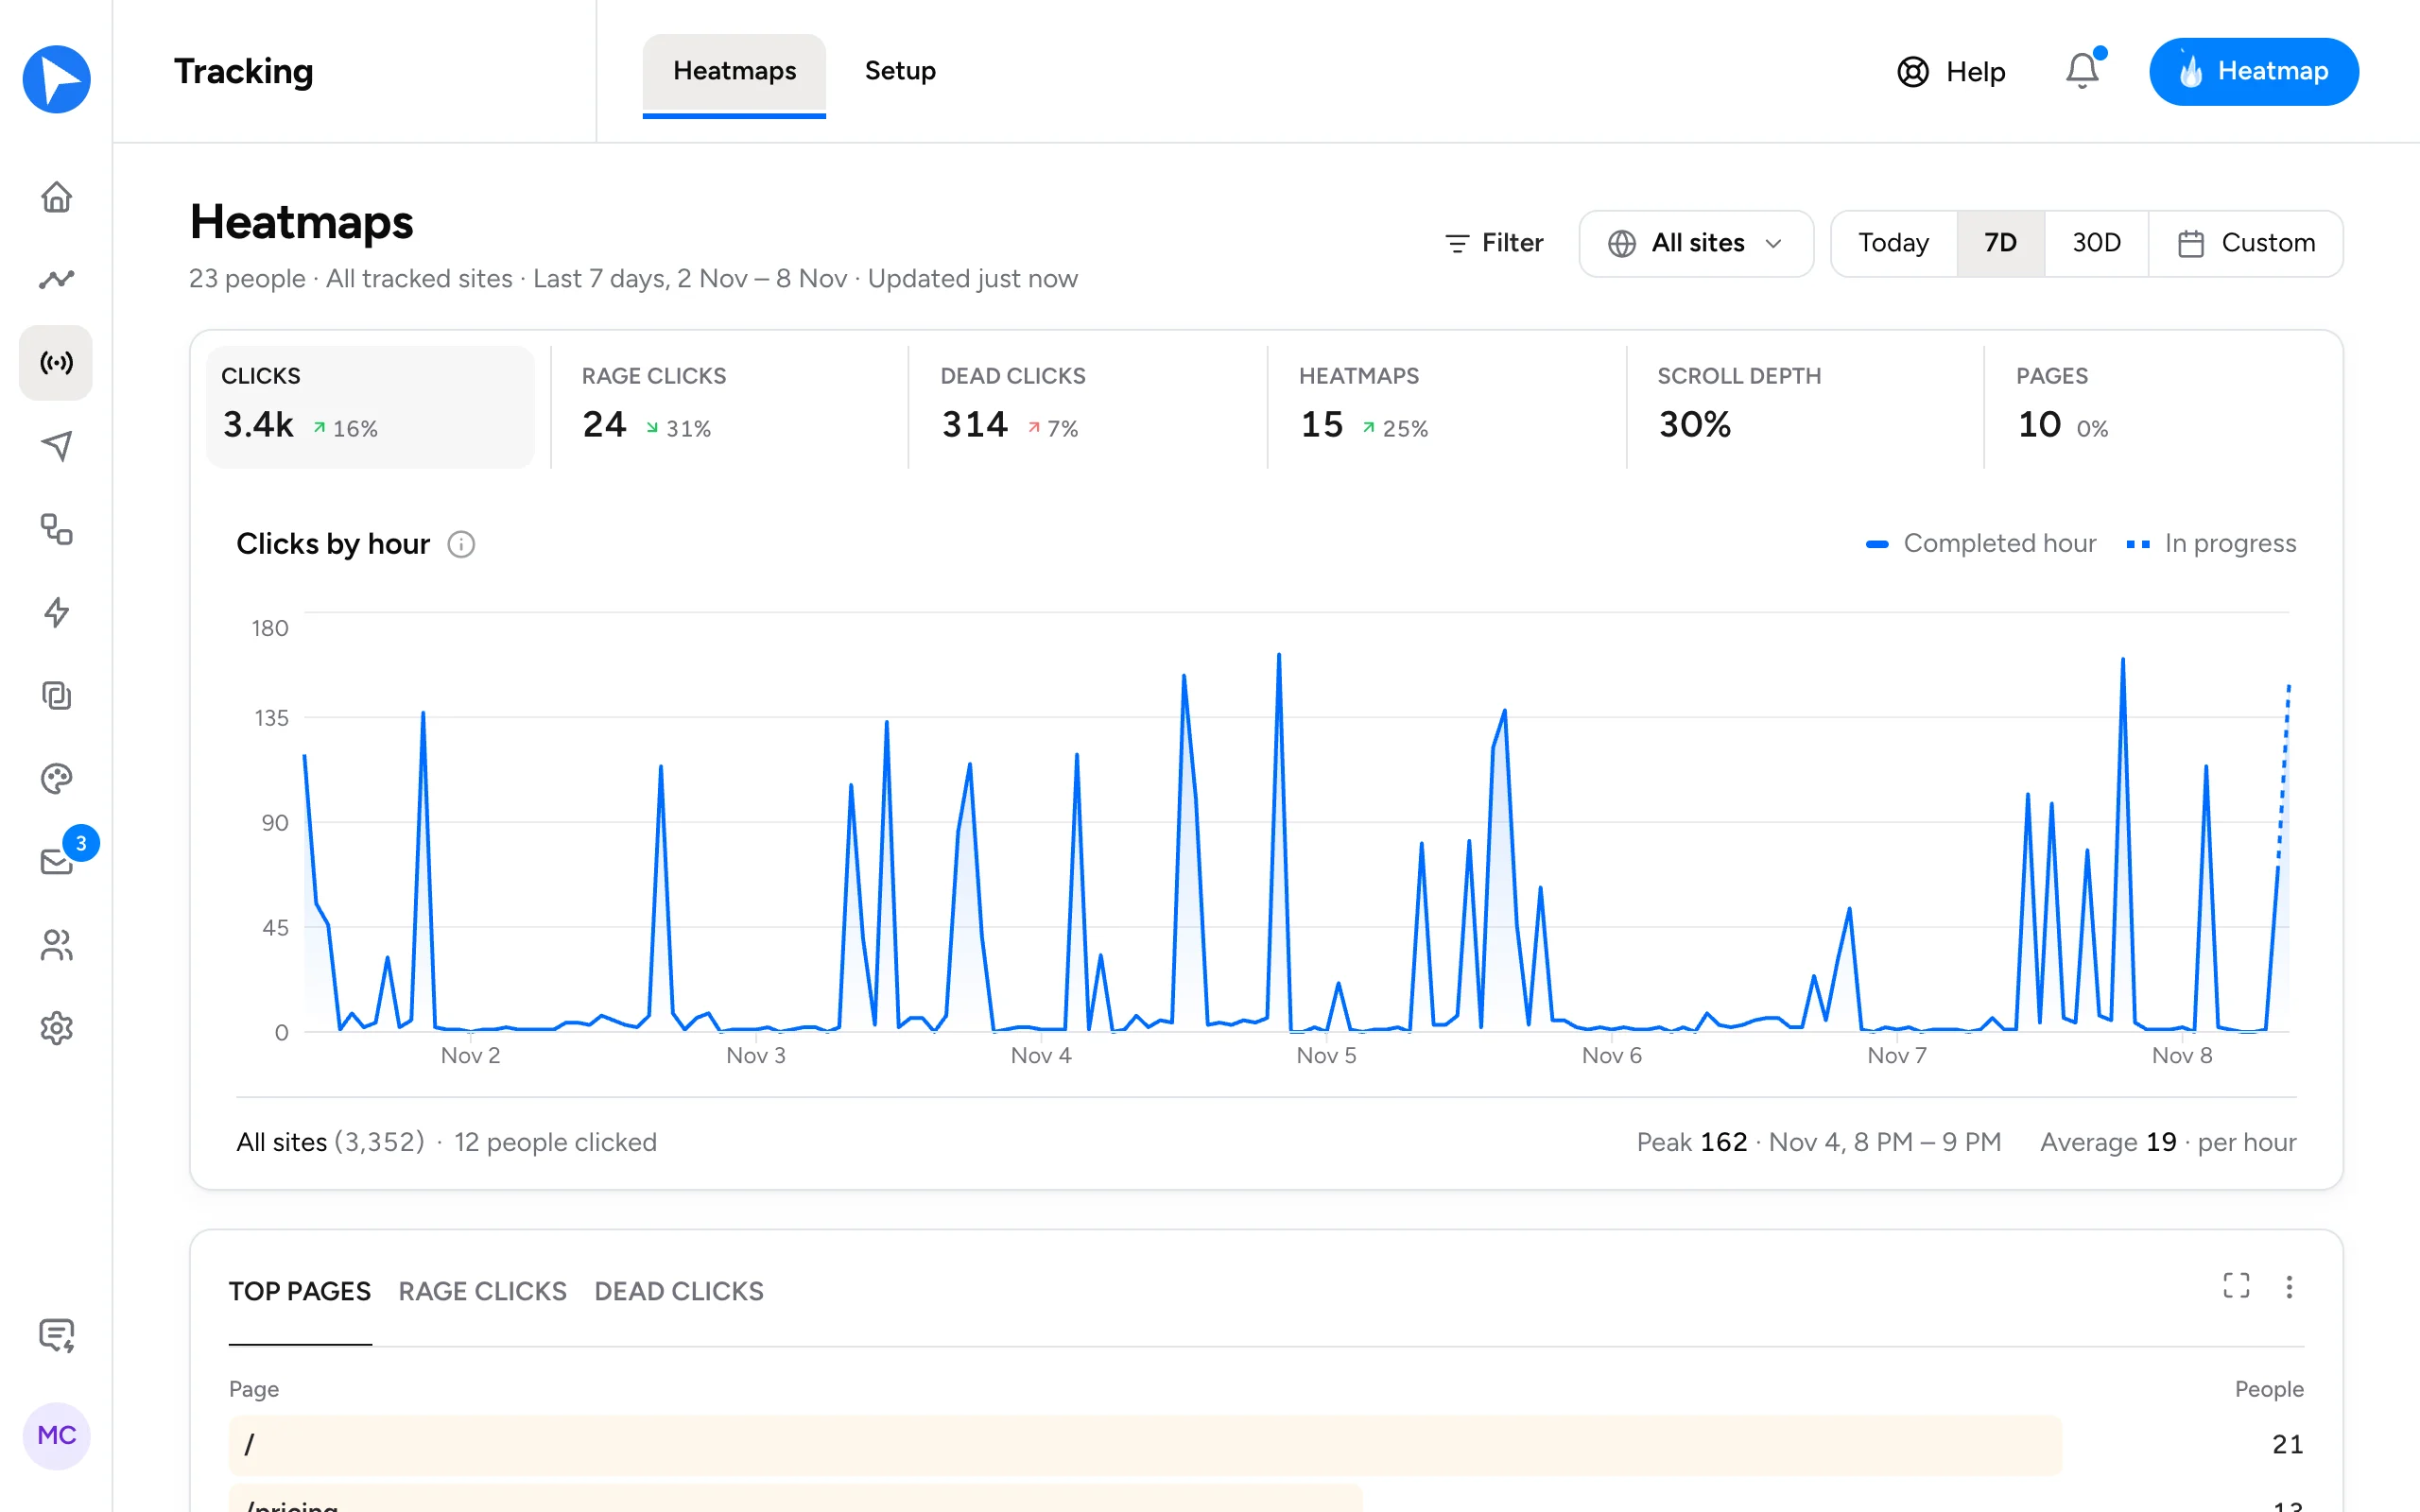
On a long page, open the Scroll layer. It shows how far down each page people got, and the Scroll depth tile sums it up over the date range. Expect clicks and scroll to thin out sharply below the fold: most visitors never scroll far, which is a property of your visitors, not of the overlay.
Every person has their own heatmap
The table under the tiles lists people, not browsers. Someone who uses your product on a laptop and a phone appears once, with the activity from both attached, because Behavly merges the anonymous IDs that belong to the same email into one row.
Each row shows the Visitor, their Country, their Browser & OS, Unique Pages, Events, and their First Visit and Last Visit. Identified and Website start hidden; View shows them. Visitors who never signed in share the same table, one row per browser.
The Heatmaps column has one icon for each layer that person left something on. Each icon opens the overlay on that layer, scoped to that one person, at the page where that layer of theirs is best seen. For an identified user, that covers every browser they used. People you have identified are always tracked, and they never count as pageviews.
Rage clicks and dead clicks show where people got stuck
Two kinds of click say more than the rest. A rage click is someone clicking the same spot over and over. A dead click is a click on something that did nothing. The snippet records both, along with the element clicked and where on it the click landed.
The Friction pill in the toolbar keeps the people who rage clicked, who dead clicked, or either, and the other pills narrow it further. Within a pill, options are OR. Across pills, they are AND. The table updates as you pick, and every answer shows how many people it would list, so a 0 tells you an answer leads nowhere before you pick it.
Say you want to know who struggled with your setup page. Pick that page in Page and Rage clicks in Friction, and the table lists the people who were on that page and rage clicked in the date range. Open one person's Rage clicks layer to see what they were clicking at.
- Engagement sorts people into Bounced (one page and under 30 seconds), Engaged (2 to 4 pages) and Highly engaged (5 or more pages, or returning within the period).
- Device is often the first filter worth setting, because desktop and phone maps are different layouts.
- Country lists the countries people in the range were actually seen from, most people first.
Bot traffic is already left out of the table, the same way Insights leaves it out, so the two agree.
One snippet recognizes who is signed in
All of this comes from one async script tag. Paste it once, in your root layout or site-wide template, so it loads on every page. Put it on your signed-in application pages too, not only the marketing site: Behavly is about what your signed-in users do. The same tag works in plain HTML and in React or Next.js.
<script async src="https://behavly.io/t.js" data-pid="YOUR_WRITE_KEY"></script>You do not call an identify function. The snippet detects a signed-in session on its own and attaches the activity to that person, looking where a login leaves it in the browser:
- Your sign-in provider's session. Clerk, Supabase, Okta and Amazon Cognito are recognized from where each keeps its session.
- Login tokens. The snippet reads the email, name and picture from an ID token and never sends the token itself.
- Your site's own responses and account screens, such as a profile menu, when the session sits in a cookie scripts can't read.
- Lead forms. An email typed into a form with no password field, such as a waitlist or demo form, identifies that person as a lead.
For a setup none of these covers, behavly.identify("person@example.com") after sign-in names the person directly. Most sites never need it.
What someone types in a field is never sent with a click, hover or view. Password and hidden fields, and fields named for card numbers, PINs and similar, are never read, and data-behavly="mask" treats any other field the same way. The snippet sets no cookies. Country is derived at the edge, and the IP address is discarded rather than stored. Add data-heatmap="off" to the script tag and no pointer movement is sampled.
Each heatmap reads from a viewing link that expires after 30 minutes, on purpose: it grants read access to behavioral data. Open the map again from Behavly and you get a fresh one.
What someone did can start the follow-up
The snippet that draws your heatmaps is the same one behind every behavioral audience in a campaign. So the activity on a person's map is the activity your campaigns and follow-up emails are built from.
 behavly
1
- A Pattern Campaign can start from a pattern Behavly found in that activity.
- A wait or a branch in a path can react to a page visit.
- Every email Behavly writes is written from what that person did on your site.
The heatmap shows you where someone got stuck. A campaign follows up from that same activity, in an email written from what they did.
Get started
- 1Go to Tracking → Setup, press Add Website and enter your domain. Behavly makes a write key for it and puts it in the snippet.
- 2Paste the snippet once so it loads on every page, signed-in pages included.
- 3Press Test script. Tested means events are arriving; Awaiting events is normal for a minute or two after install.
- 4Open Tracking → Heatmaps and press Heatmap, or open one person's map from the Heatmaps column.
The full setup is in Install the tracking snippet. The layers and per-person maps are in Heatmaps, every pill in Filtering the Heatmaps table, and everything the snippet records in What the snippet collects. For the overview, see Heatmaps.